XCode is the program we will use throughout this course. For the first two sections, all project will start with the Command Line Tool template. This will let us focus on learning the Objective-C language before moving on to iOS.
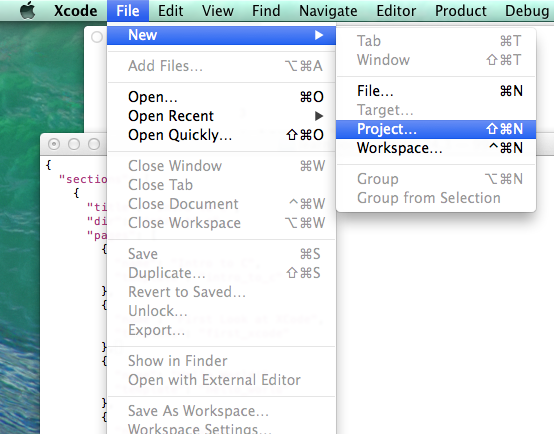
First, create a new project. In XCode, a project is a collection of resources that will result in a single product. That product could be an application, a library for others to reuse, or even In App Purchase content. Create a new project from the menu.
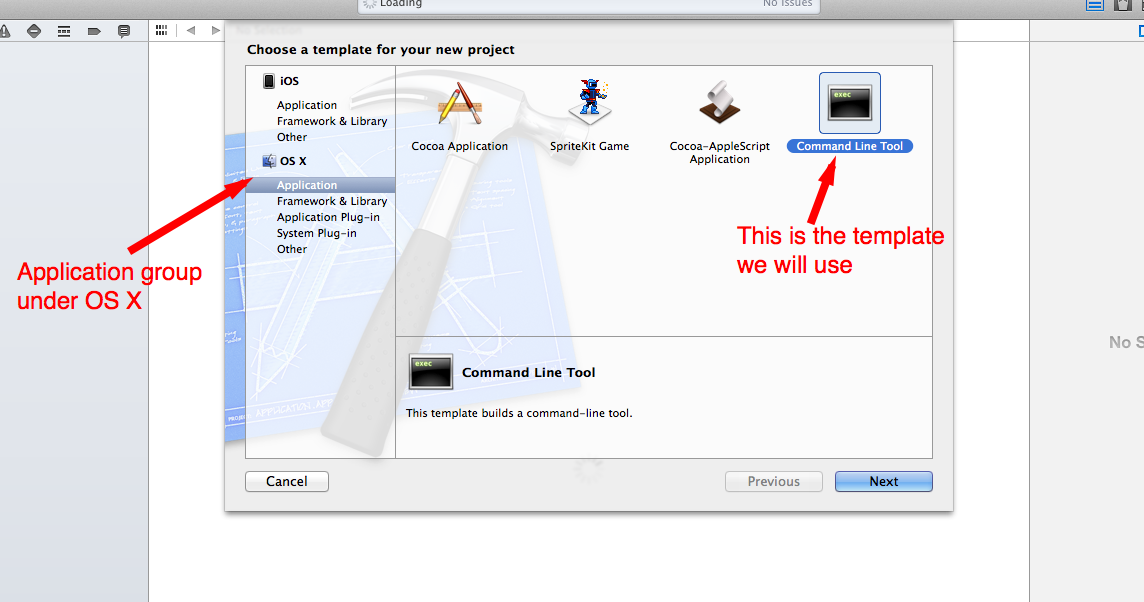
Next XCode asks us to pick a template as the starting point. Choose the Command Line Tool template.
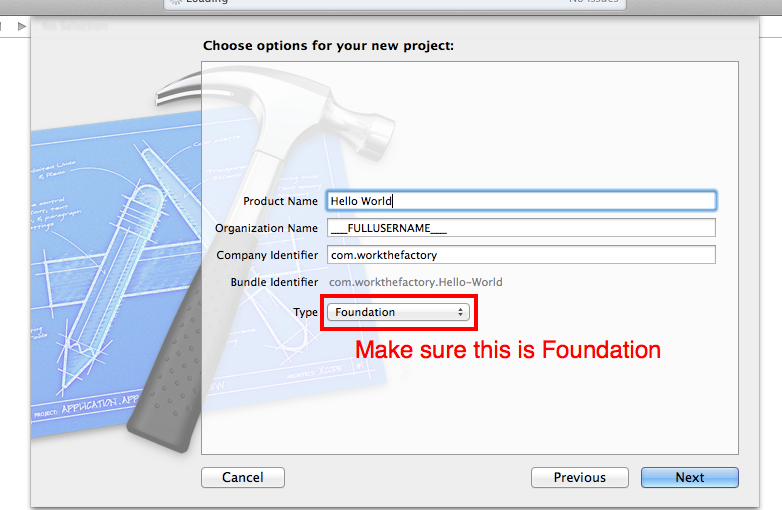
Once you have selected a project template, XCode needs a few more details.
This drops us into an open project. The default XCode UI is composed of four main areas.
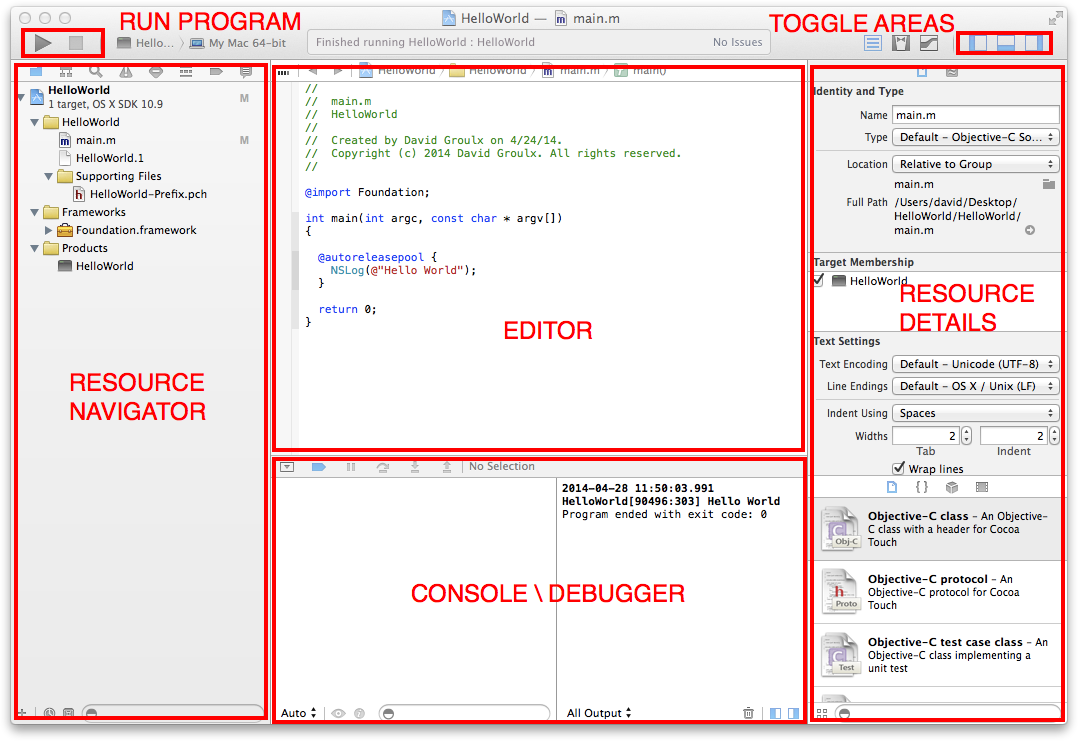
This is where you edit files.
Even the smallest iOS applications will have 10+ separate files, not to mention a collection of resources for the user interface, icon images, sound files, etc. The navigator helps you keep these all organized. The icons at the top of the navigator pane provide several ways to search through your project. For the most part we will only use the far left folder icon which shows the files that make up your project.
This is the area where you interact with your program. The right side shows all console output from your program. This is also where you will provide text based input for homework assignments.
The right side of the console \ debug window is used in the process of debugging. This will display all variables that are in scope and their values. We will see more of this soon.
XCode provides tools for graphically designing your user interfaces. Settings and information about individual UI components will appear in the resource details pane. Later we will be using this area extensively, but for now we are only seeing details about the currently selected resource, the main.m file.
Often we do not need to see everything all at once. In this case, hidding some of the auxilary information can help us focus on the task at hand. Each button hides or shows one of the areas. For now, since we are only working with a single file, hide the resource navigator. We don't need resource details either, since it is mainly used when working with user interfaces. This should leave you with the editor pane and the console \ debuger.
When you are ready to run your program, hit the play button in the top left of the screen. This will cause Xcode to compile and run your application. Output will appear in the console \ debugger area. Once we are working on iOS applications, pressing the play button will also launch the iOS simulator. If at any time you want to stop the running application, hit the stop button.